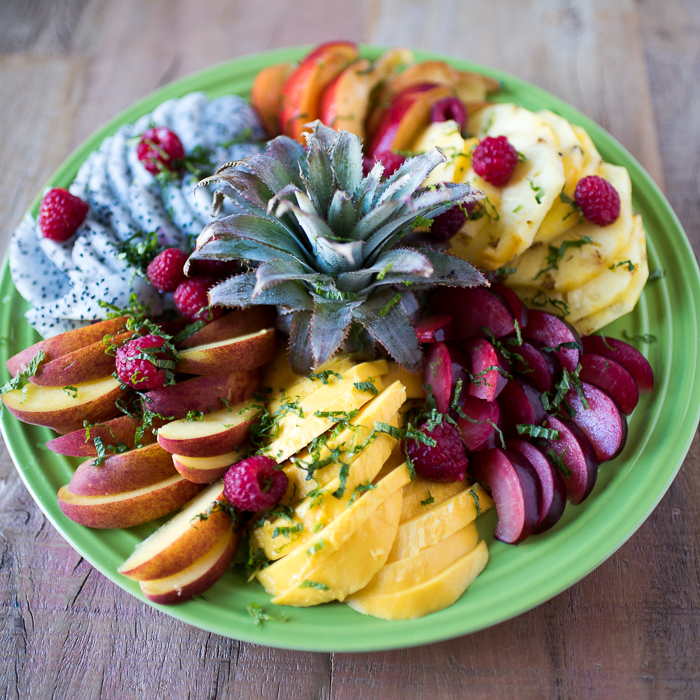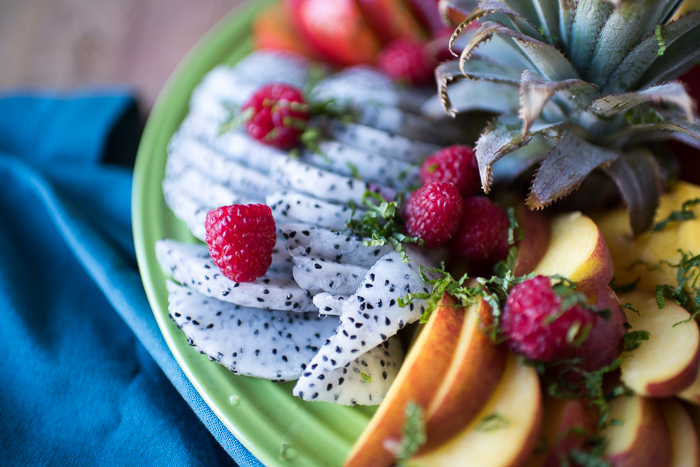
Have you ever seen such an alien fruit such as this? This is a dragonfruit, and you can definitely tell where it gets its name. It’s leaves look like dragon scales, and that gorgeous color on the skin is sure to catch your eye.

Melissa’s Produce always has all kinds of exotic fruits, of which they supply not only grocery stores, but also the food service industry. Recently, Melissa’s hosted a photography workshop for a select group of food bloggers featuring professional photographer Bob Hodson. Bob will photograph anything, from automotive tires to landscape & art, but the project he’s most passionate about is Chef’s Insight, his personal project that showcases the processes and lives of chefs around the world. It’s an inside look into what all goes on in the chef’s kitchen and is pretty dang cool!

During this workshop, Bob talked about quite a few things to help improve our photography skills. I don’t know about you, but I’m always down to learn about new methods, or new products, and I want to share what I learned from him!
Nova Bluetooth iPhone Flash
This is the one thing that makes my picture-taking, foodie-obsessed, beer-loving self so incredibly happy – a light source for pictures taken in dark spaces! Imagine yourself out to dinner at a fantastic restaurant with your loved ones or friends, and you order a spectacular meal that you’d like to get a good photo of. Enter the Nova Off-camera Wireless Flash for iPhone!
It’s a mobile, hand-held flash that delivers soft, natural diffused light for exactly this situation. That is SO much better than asking a friend to give you a light source using the built-in flashlight app on the iPhone, which is harsh, and creates sharp, unwanted shadows. It only works with iPhone, iPad and iPod, but hopefully they will branch out and be able to pair with other devices soon!

Scrims & Reflectors
Scrims, by definition, are a “Sheet of gauze or translucent material used to weakly diffuse a light-source, giving a soft but still directional light like hazy sunlight.” – iDigitalPhoto.com

Here, Bob was showing us how to use a scrim. A scrim would typically be useful outside, on a super sunny day, and would be held between the light source (the sun), and the subject of the photo in order to diffuse the light, and remove any harsh shadows. They’re super easy to find on Amazon, and very affordable. This one pictured below is 2’x3′, and is plenty big for plated food photography!
This particular product also contains reflectors, which are great for removing shadows, highlighting a particular element of your photograph, and creating a different look and feel to whatever you’re photographing. Unlike a scrim, you’d place the reflector on the other side of the subject in the photo, opposite the light source. The kit above, has 4 different reflectors in white, black, gold, and silver. The white would highlight a particular element of your photograph, and will remove shadows, the black will darken, the gold will give the photograph a warm hue, and the sliver is much like the white, but gives more brightness and is more directional, giving you more control over what can be highlighted. These are pretty affordable at a whopping $18.68, but you can really cut down on costs by going to a local craft store, and buying a white poster board if you want to try out using a reflector with minimal commitment. I’ve used a poster board for a long time to highlight my photos, and it’s worked amazingly for me! In these photos of the platter, I’ve placed my poster board on the right hand side, with the light source being a window on the left hand side.

Wired and Wireless Remote Shutter Release
If you want to prevent any motion blur at all in your photos, this tool is the way to go! If you want to shoot at a low ISO, meaning that you want to reduce the graininess in the photo, and also want to bring in as much light as possible with a low aperture, it means that your shutter speed will have to be slower, to let in the right amount of light for a properly exposed photo. Longer shutter times mean that there will be a chance for motion blur, and that is no bueno! Even a slight movement as teeny-tiny as pressing your shutter button will cause enough of a blur to scar what would have been a fantastic photo. This is where the remote shutter release comes in!
With your camera on a tripod, set up your shot, and start clicking away sans motion blur! The shutter releases come in both wireless and wired – the former being more expensive. The wired ones are pretty affordable too, however if you’re strapped for cash, you can also emulate this by using the self timer on your camera.

Every outing to Melissa’s always ends with a plethora of awesome produce, and this time I made out with some fruit that was out of this world, including gorgeous dragonfruit, mango, baby pineapple, pluots, nectarines, peaches, mint, and raspberries. Perplexed as to what to do with all of this fruit, I decided to make a simple, yet exotic fruit platter. Just chop up those babies, and arrange them artfully on a platter, and you’re good to go! Use the natural “props” to create drama. For this platter, I used the top of the baby pineapple as the centerpiece, but you could use the hollowed out dragonfruit skins as fruit “bowls” too.

You don’t have to stop there either – recently the hubs and I watched an episode of Brew Dogs, where they highlighted Founder’s Brewing who used old bourbon barrels that once aged maple syrup to age their Kentucky Breakfast Stout (KBS). What a mouthful! In this episode, they highlighted where Founder’s got these barrels from, BLiS Gourmet, that makes the delightful Bourbon Barrel Aged Maple Syrup.
What I’m trying to say here is that you can dress up your exotic fruit platter with a drizzle of exotic real maple syrup. Add in some mint for a bit of earthiness, and you’ve got a fantastic accompaniment to brunch, or a sweet breakfast!
Exotic Love,

- 1 Mango
- 1 Dragonfruit
- 1 Baby Pineapple
- 1 Pluot
- 1 Nectarine
- 1 Peach
- 1/2 Cup Fresh Raspberries
- 1 Tablespoon Thinly Sliced Fresh Mint
- 2 Tablespoons Pure Maple Syrup
- Processing some of these exotic fruits can be intimidating, so I’m going to do my best to describe how to do it:
- A mango has a long, flat pit in the middle of it, so the best way to cut it is to make two cuts on both sides of the pit. The pit is generally a half inch wide at its widest.
- Place the mango on your cutting board where it’s “nose” is facing directly upward. This “nose” just looks like a little nub.
- Now, think of this nub as the center of that half-inch pit. Take your knife, and move it about a quarter inch from the center of the mango, and cut off one side of the mango. You may hit the pit, so if you do, just move it over a little bit more and try again.
- Repeat with the other side.
- The easiest way to remove the skin of the mango is to take a large spoon, and gently work it between the skin and the flesh of the mango. The sharper the edge of the spoon, the easier this process will be.
- Try to keep the flesh all in-tact. Once the skin is removed, slice!
- The middle of the mango is probably the most tricky. Use a knife to remove the skin from this middle part, and then lay flat on the cutting board.
- Very carefully, place your knife on an angle, and cut the flesh off the pit by starting in the middle, and moving your knife down at an angle to cut the flesh off the pit.
- Be very careful, as a mango’s flesh is very slippery. Slippery things and knives can be dangerous. The flesh from the center will look abnormal, so it may be something you don’t want to put on your platter. Freeze it, and use in smoothies!
- Using a sharp knife, cut the fruit in half from root to tip.
- Like the mango, use a large spoon to scoop out the flesh keeping the flesh as in-tact as you can.
- Slice!
- Cut off the top, and cut off the bottom, trying to leave as much flesh on as you can. Then place right side up, and working around the pineapple, cut the skin off in strips, so you’re left with a skinless pineapple.
- Big pineapples have very tough cores, so normally you’d cut them out, but the cores on baby pineapples I find to be tender enough to eat. I welcome the change in texture, actually!
- Cut into slices after the skin is removed.
- Some stone fruits are referred to “cling-stone” because the pit clings very tightly to the flesh, and can be hard to remove.
- The easiest way I’ve found is to make a cut completely around the fruit, from root to tip. Then make another cut about 1/4 inch from the initial cut to make a wedge.
- With your knife still in the fruit after making the cut, wiggle the blade towards the initial incision, and carefully release it from the pit. Repeat for the remaining fruit.
- If you get it half way done with this method, you can also use a paring knife to cut the pit out of the fruit.
- You can use the baby pineapple top as a centerpiece, then carefully arrange the fruit around the platter, grouping them together.
- Add the raspberries all around the top of the arranged fruit, then drizzle with maple syrup and thinly sliced mint.
*Disclaimer: Melissa’s Produce invited me to this workshop, and sent me home with produce. I purchased the maple syrup. I was not compensated in any other way, and all opinions are entirely my own.


WOW that is a beautiful platter! Thanks for all the great photography tips as well.
Thanks Cathy! It was such a pleasant surprise to see you there!!!
Great tips! And I LOVE the fruit platter!!! That would be a show stopper!
Thanks Mila!!