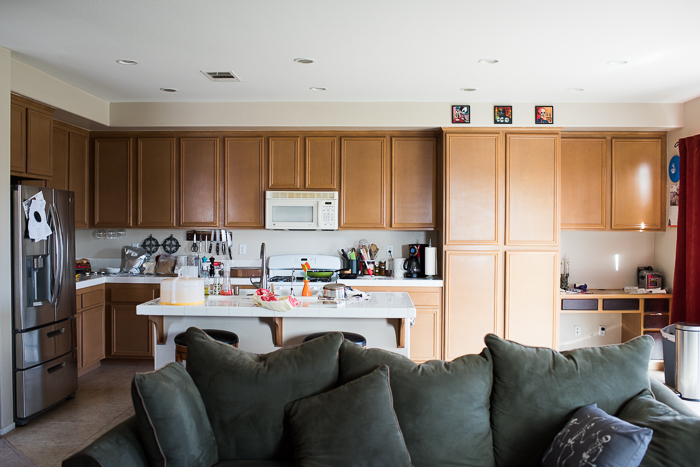
Hello my beautiful, wonderful friend! It’s been awhile, and I’ve MISSED YOU! The reason for my hiatus is this: The Hubbs and I are doing a kitchen demo and remodel. Between the day job, and this, by the end of the day, my mental faculties are shot. I just awoke from a 10+ hour slumber, and wanted to give you a quick update! Above is a before shot of what the kitchen looked like long before the remodel. This is what we’ve been doing:
We took out this desk area awhile back. We never used it, so we thought it would be a good introduction to the demo process.

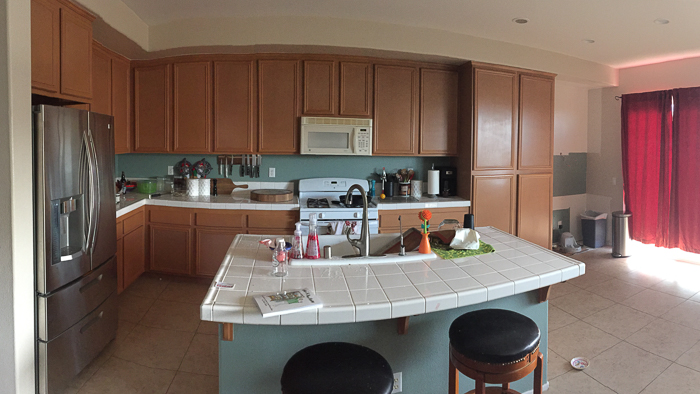
A panoramic shot of our kitchen before the real demo started:

Island and back door area:

Island and stove area:

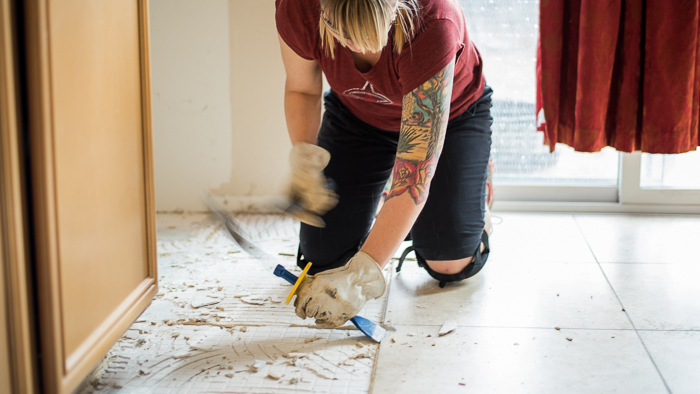
Here, we are getting down to business, and getting those tiles up! Initially, we smashed some of the tiles with sledgehammers. While that was great to get out our aggressions, it wasn’t the most practical. It was messy, and required a lot of energy. After some googling, we bought some heavy duty chisels, and more often than not, we were able to pull up the whole tile at once, making trips to the garbage can that much easier.

What you see here is the residual thinset, which is the glue that keeps the tile adhered to your concrete slab. This needed to come up too, but doing it by hand with the chisels would have taken FOREVER. My dear friend’s Dad lent us his power drill with a 2″ chisel to help speed up the process. There are bigger hammer drills with wider bits, but we opted for the free version, and put in a little more work. You’ve got to save money where you can when dealing with a kitchen demo!


One thing we learned the hard way: when you get that thinset up off the floor, it is incredibly dusty. The first pass, we had no plastic sheeting sectioning off the kitchen, and dust got everywhere! Once we put the plastic up, it kept everything pretty confined to the area.


At this point, we’ve chiseled off all of the thinset, and just small bits remained. We removed all of the wall cabinets, and only the island is left.

The tile on the island comes off first, then the concrete and metal mesh beneath that, and then the plywood. After that, the cabinets are dismantled and moved to the garage. The Hubbs found a great organization that helps homeless Veterans by building homes for them to live in. They need any donations they can get, including cabinets, so not only were we able to get rid of our cabinets, we were helping someone in need. That’s a great feeling. If you are doing a kitchen remodel, make sure to check for this kind of stuff in your area. The organization we donated to in our area was Restoring Hope.

We’ll find a new home for you soon, little guy!

Little chunks of thinset remained, so we had to rent a “floor maintainer” with a mastic (or thinset) removal diamond coated blade to get all the way down to the concrete. We did this so that the laying of the tile would go smoothly. The Hubbs handled the operation of this un-wieldy machine, while I made sure there was enough water for the blade to do its duty properly.


The floor here is still wet after using the “floor maintainer”. Seems that there should be a more descriptive name for that, like “thinset demolisher” or “wall breaker” or something. This machine has quite a bit of force that I wasn’t ready for, and testing it at the rental place, I almost took out a whole aisle of tools. HA! It’s definitely a must-have tool rental for a kitchen demo.

Our bare, smooth-as-a-baby’s-butt concrete. I’m in love!

I am so grateful for the advice from all of our friends who are in the field. Not only was it was a good thing to heed them by using the floor maintainer, but also to apply “Red Guard” to the concrete before laying the tile.

Red Guard is a waterproofing and crack prevention membrane. What that means is that if an earthquake occurs, and you get a crack in your concrete slab, the Red Guard prevents that crack from transferring over to your tile. Waterproofing is also a plus, especially in the kitchen. It didn’t say this on the label, but I imagine it’s good to prevent ants from coming up through any existing microscopic cracks in your slab. WINNING! One last thing to consider even before the Red Guard is a self-leveling concrete. Our house was not built that long ago, and our concrete slab was very flat, so we didn’t need to use it. (Spoiler alert – we have installed the tile already, and had no problems, so I can conclude with certainty that in our particular case, the self-leveling concrete was not necessary.)

The Red Guard goes on a neon pink, is very stinky (wear a mask!), and dries red, hence it’s name.

That’s about it for now! I hope to have some recipes to you soon, so stay tuned.
Until then, I’ll leave you with some notes:
Kitchen Demo Notes & Overview
- Invest in some leather gloves.
- Get some good masks – the thinset dust is a BITCH. I got sick after the week of serious demo, and I think it was partially due to breathing in the dust. I had a mask on the whole time too…
- Safety goggles are a must. Spend the money and get a good, comfortable pair that won’t fog up on you.
- Knee pads are a life-saver! Don’t skimp on the quality of the knee pads. You need to take care of your knees!
- Ask friends, and borrow tools where you can.
- Check with your local waste management company for waste removal. Demo waste is very heavy, and there is a lot of it. Chances are your waste management company can give advice and help you get rid of it. We donated our cabinets, but the tiles were very heavy. We coordinated with our neighbors who let us use their cans, but we could have made this easier on ourselves by just calling our waste management company first.
- Check sites like Habitat for Humanity if you’re game for donating your cabinets. That was the search that led us to our local Restoring Hope charity. Less waste for the landfills, and you’re most likely helping someone out in a huge way.
- Get advice from any friends of yours who might be in the industry. Their insight will keep you from making costly mistakes!
- Stock up on the booze, and if you’re doing this with a partner, make sure to communicate well, and show affection regularly! It will make the kitchen demo process go so much smoother. Pinkie swear!
I’ll detail the next part of the journey, and hopefully have the final reveal soon! I can’t wait to cook again!
Keep Rockin’,

P.S. You can continue by reading the other posts in this series!


You guys even make destruction look cool!
Why thankya, kind Sir!
So that’s what all that racket is over there! LOL! All points are valid! I have trowels n sponges n some tarp n who knows what else in my garage…just waiting to be used or borrowed or… wish I had heavy duty tools, but I know I can’t handle them…YET
Can’t wait to C the finished product!
Habitat Restores sometimes have new stuff at affordable pries, like cabinet handles, lighting, etc + you are investing in the community. Don’t forget to write off those cabinets donated to a non-profit
Yes, Vikki, we’ve been busy! If you need any tools at all, just let us know! I’ll check out Habitat Restores… thanks for the heads up!!
Wow! Great post! I love that you donated your kitchen cabinets! One of my big pet peeves is watching home improvement shows where there is nothing wrong with cabinets and they take a big sledge hammer to them!
Thank you so much Wendi. I know I get mad too – we don’t need MORE STUFF going to our land-fills. I felt guilty enough just throwing the old tiles away, and other demo materials. We were super happy that the cabinets are now going to someone who needs them, and not going to the land-fill!